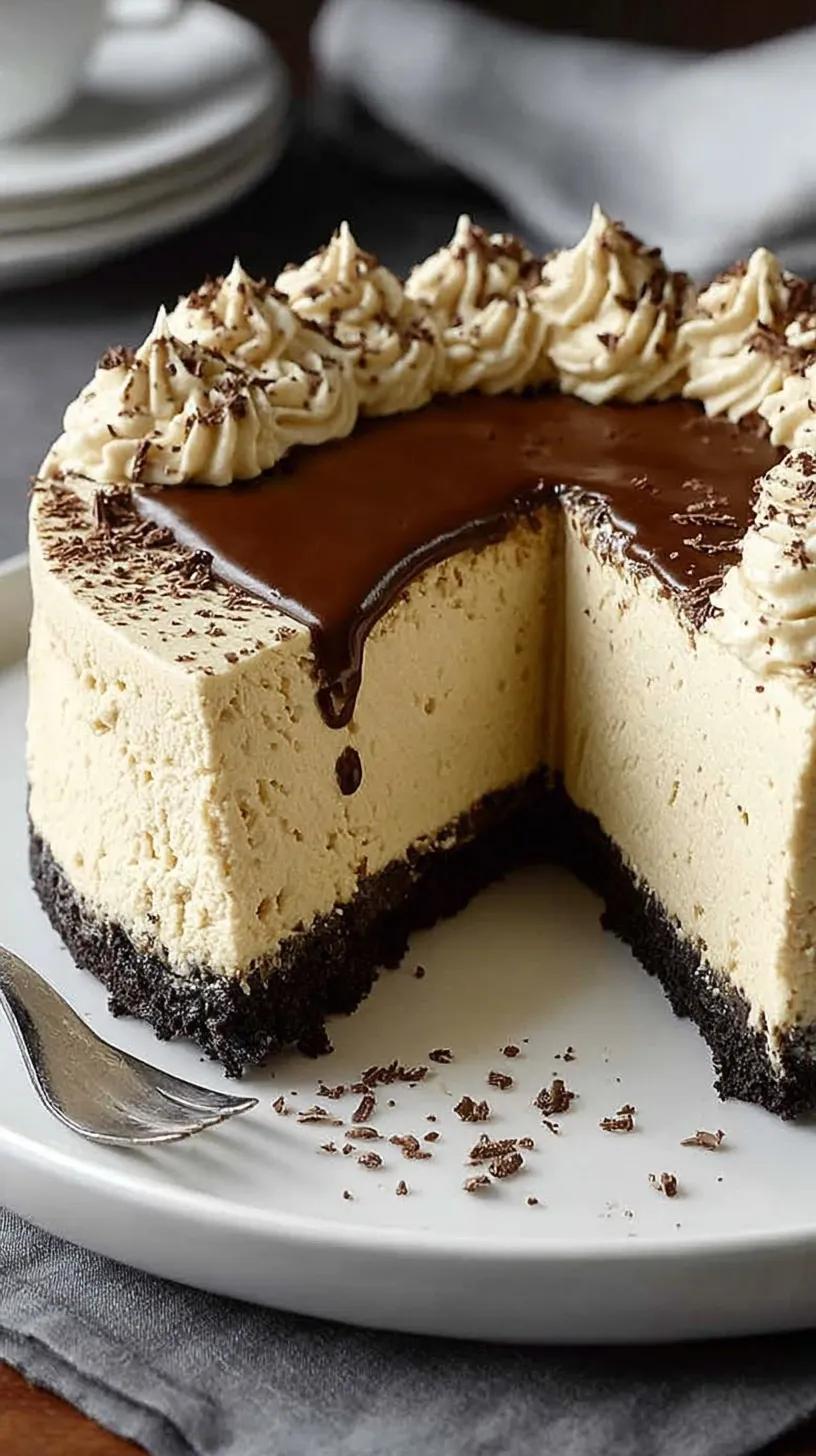
Creamy High Protein Coffee Cheesecake (No-Bake!)
Too hot to turn on your oven? This High Protein Coffee Cheesecake is for you.
You deserve a treat that feels indulgent but keeps you energized. This recipe delivers a bold caffeine kick in a cool, creamy slice. It is the perfect way to satisfy your sweet tooth during a healthy reset.
Why This Recipe Is a Winner
This dessert is a total game changer for your weekly routine. It combines your love for coffee with a massive protein boost. You get a restaurant-quality texture without any of the heavy sugar or fat.
It is ideal for summer because it stays completely chilled. You can prep it on Sunday for easy meal prep lunches all week long. It is light, refreshing, and keeps you feeling full and focused.
Simple Method
Making this cheesecake is incredibly straightforward and stress-free. You simply prepare a quick crust and whisk the filling together. There is no complicated baking or water baths required here.
The fridge does all the hard work for you. Even if you are a beginner, you can achieve a perfect set every time. You just need a little patience while it chills to perfection.
Ingredients You’ll Need
Most of these items are likely already in your healthy pantry. Using fresh Greek yogurt ensures a tangy and light finish.
- 1.5 cups Graham cracker crumbs
- 30 grams Whey protein powder, unflavored
- 3 tablespoons Coconut oil, melted
- 8 ounces Low-fat cream cheese, softened
- 2 cups Non-fat Greek yogurt
- 60 grams Coffee-flavored whey protein powder
- 2 tablespoons Instant espresso powder
- 0.25 cup Water, hot
- 0.5 cup Granulated erythritol or stevia sweetener
- 1 teaspoon Vanilla extract
- 7 grams Unflavored gelatin
Step-by-Step
- Combine graham cracker crumbs, unflavored protein powder, and melted coconut oil; press into the base of a 9-inch springform pan.
- Dissolve instant espresso powder in hot water and set aside to cool.
- Hydrate gelatin in 2 tablespoons of cold water, then heat briefly until liquefied.
- Beat softened cream cheese and Greek yogurt together until no lumps remain.
- Add sweetener, vanilla extract, coffee-flavored protein powder, and the cooled espresso liquid to the base.
- Whisk the liquefied gelatin rapidly into the cheesecake batter to ensure even distribution.
- Transfer the batter onto the prepared crust and level with a spatula.
- Chill the assembly at 4 degrees Celsius for a minimum of 4 hours to allow the protein and gelatin matrix to set.
Best Ways to Enjoy It
Serve a slice with a few dark chocolate shavings on top. It looks beautiful and adds a lovely little crunch. You could also add a dollop of light whipped topping.
Pair this with a glass of cold brew for a double coffee treat. It is a wonderful afternoon pick-me-up on a warm day. Simply slice it, plate it, and enjoy your hard work.
Storage & Reheating
Keep your cheesecake in the refrigerator until you are ready to eat. It stays fresh and firm for up to five days. Use an airtight container to keep the flavors bright and clean.
You can also freeze individual slices for a longer-lasting treat. Wrap them tightly in plastic wrap before placing them in a freezer bag. Thaw in the fridge for an hour before you plan to enjoy.
Recipe Tips
- Don’t skip the gelatin or the cake will not set properly.
- Ensure your cream cheese is fully softened to avoid any lumps.
- Use a hot knife to get clean, professional-looking slices.
- Whisk the gelatin in quickly to prevent it from clumping.
- Double the espresso powder if you prefer a very strong flavor.
- Add a sprinkle of cinnamon to the crust for extra warmth.
Ways to Switch It Up
- Swap the graham crackers for crushed chocolate cookies for a mocha vibe.
- Use vanilla protein powder if you cannot find coffee-flavored powder.
- In summer, top with fresh raspberries for a bright, tart contrast.
- Try honey instead of stevia for a more natural floral sweetness.
Common Questions
Can I make this ahead of time?
Yes, this is actually better when made a day in advance. The flavors meld and the texture becomes perfectly firm. It is the ultimate make-ahead dessert for busy weeks.
Can I use a different sweetener?
You can use any granulated sweetener you prefer for this recipe. Just be sure to check the conversion ratio on the package. Monk fruit also works very well in this filling.
Will my kids enjoy this?
If your kids like the taste of coffee, they will love this. For a kid-friendly version, use decaf espresso powder instead. It still tastes like a creamy, delicious treat.
I hope this refreshing cheesecake brings a little joy to your summer afternoons. It is proof that eating well can still be incredibly delicious. Happy chilling!
— Clara
Ingredients
Method
- Combine graham cracker crumbs, unflavored protein powder, and melted coconut oil; press into the base of a 9-inch springform pan.
- Dissolve instant espresso powder in hot water and set aside to cool.
- Hydrate gelatin in 2 tablespoons of cold water, then heat briefly until liquefied.
- Beat softened cream cheese and Greek yogurt together until no lumps remain.
- Add sweetener, vanilla extract, coffee-flavored protein powder, and the cooled espresso liquid to the base.
- Whisk the liquefied gelatin rapidly into the cheesecake batter to ensure even distribution.
- Transfer the batter onto the prepared crust and level with a spatula.
- Chill the assembly at 4 degrees Celsius for a minimum of 4 hours to allow the protein and gelatin matrix to set.